
Thinning scissors are the most misunderstood tool on an Australian cutting station. Used correctly they remove weight, blend disconnections, and polish finishes; used poorly they carve lines and chew through curls. This guide breaks down how to choose the right shear, how to hold and control it, and when to thin at the chair versus the basin.
Quick reference
- Best for: Softening lines, diffusing bulk, finishing fringes.
- Tooth counts: 30–40 teeth for blending, 20–28 for texture, 6–16 for chunking.
- Use on: Dry hair for polish, almost-dry hair for weight removal, clean sections only.
- Avoid: Over-thinning fine hair lines, horizontal passes on straight hair, repeat cuts in the same section.
1. Analyse the hair before you reach for a shear
Start with the density and curl pattern in front of you.
- Dense straight or wavy hair: plan to thin 3–5cm away from the scalp to avoid regrowth spikes.
- Curly/coily hair: thin in vertical panels with lighter pressure; over-thinning collapses shape and invites frizz.
- Fine hair: restrict thinning to blend seams only. Substitute texturising techniques such as channel cutting for weight removal.
Record these observations in the client card so you can refine future services.
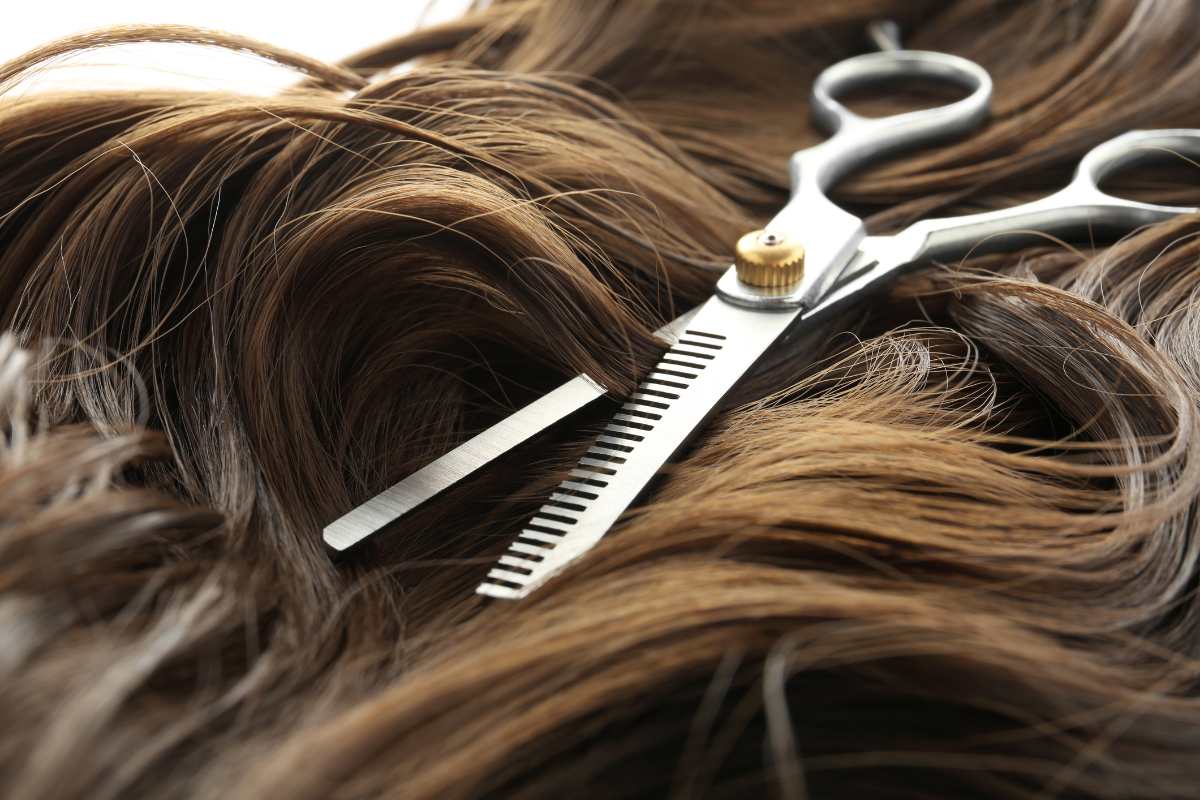
2. Match the thinning shear to the task
Choose the right tool before you section.
- Finishing/blending (30–40 teeth): smooth V-shaped teeth, light cut rate (~25–30%). Perfect for erasing scissor lines and softening face frames.
- Texturising (20–28 teeth): wider spacing, deeper notches. Adds movement to mid-lengths without destroying weight.
- Chunking/debulking (6–16 teeth): aggressive cut, use on dense internal sections only. Keep at least 4cm from the perimeter.
If you only stock one thinning shear, make it a 30-tooth blender with convex edges—it’s the most versatile starting point.
3. Hold and control the shear correctly
A stable grip prevents strain and ensures even pressure.
- Insert the ring finger into the top eye, thumb into the bottom eye.
- Rest your little finger on the tang for balance; index and middle fingers sit along the shank.
- Move only your thumb to open and close the blades; keep the rest of your hand relaxed.
- When cutting, keep the toothed blade on top and the solid blade underneath. This pushes cut hair away from the scalp and avoids track marks.
Maintain sharpness—dull teeth snag and fold hair instead of cutting cleanly.
4. Salon workflow: thinning after a standard cut
Follow this sequence to maintain control.
- Dry and detangle the hair. Work with clean sections; moisture hides density pockets.
- Section the head into manageable zones (nape, crown, sides, fringe).
- Blend seams first: hold hair between your index and middle fingers, insert the shear 1–2cm above the seam, close once, and comb through.
- Remove interior bulk: elevate the hair at 90°, open the shear, slide in mid-strand, close softly, and exit. Comb after each snip to check weight removal.
- Detail the perimeter: point the shear vertically and skim the ends for softness. Avoid the first 2cm at the hairline on fine hair.
- Finish and check: blow-dry or style, then inspect under salon lighting. Touch up any heavy areas with single, controlled cuts—never rapid-fire snips.
5. Blending fades with thinning scissors
Barbers rely on thinning scissors to polish clipper work.
- Work with a comb: hold the comb horizontally, trap the hair, and close the thinning shear along the comb to diffuse dark spots.
- Use reverse orientation (teeth facing the comb) for extra control on dense crowns.
- Keep strokes light; overworking one area creates dips that are difficult to correct.
6. At-home use: safe guidance for clients
If a client insists on at-home thinning, set expectations.
- Thin less hair than you think—two to three controlled snips per section is enough.
- Use a mirror and good lighting; work on clean, dry hair.
- Stick to the mid-lengths. Never thin near the scalp or hairline without training.
- Follow up with a professional appointment to rebalance the cut.
Provide these instructions in writing if you sell consumer thinning shears.
7. Troubleshooting cheatsheet
| Problem | Likely cause | Fix | |—|—|—| | Visible lines or holes | Horizontal passes or repeated cuts in one spot | Recreate the section, elevate vertically, and blend with light, diagonal strokes | | Hair feels frizzy or rough | Cutting too close to the scalp or on damp curls | Move further down the strand, ensure hair is fully dry, and use a smoothing product | | Client complains of “fluffy” regrowth | Over-thinning in the crown or fringe | Leave more weight at the base; schedule maintenance cuts to reshape |